May 27, 2016 Courses Tutorials
This is a tutorial about how to use your online interface to publish a project in GitHub Pages, GitHub’s website builder, directly from your code repository.
The process is neither obvious nor intuitive, but rather simple - and in this case we won’t resort to Git, command line or other more advanced resources programmers generally use to be faster and collaborate on the same repo, but that could be more difficult to learn at first.
GH-Pages is a good way for you to easly upload your website or project for free, without using any CMS.
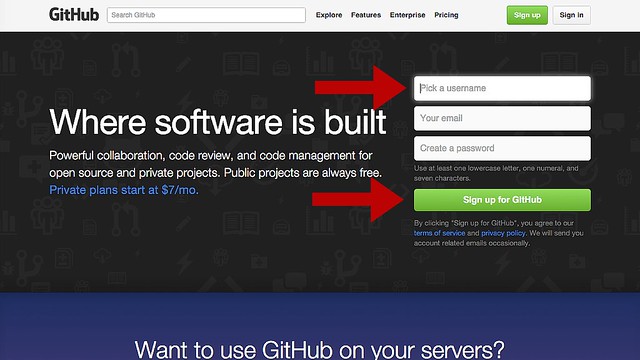
- First, open an account in no GitHub, if you don’t have one. It is free and fast.
- Don’t forget to confirm this account - you will get an email asking you to do so.
- After this step, access your main GitHub webpage, where you will be able to create repositories, files and sites
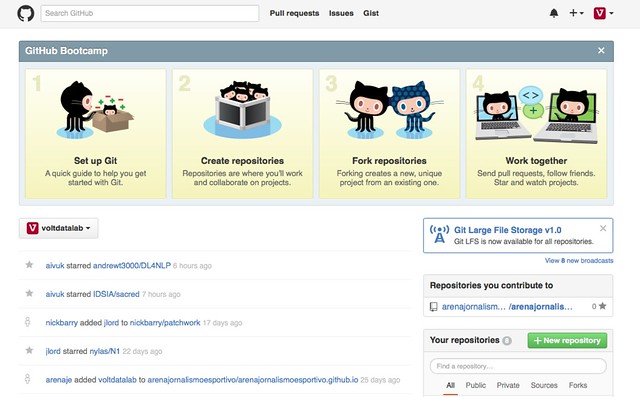
- Now, you should create a new repository, by clicking in
New Repository.

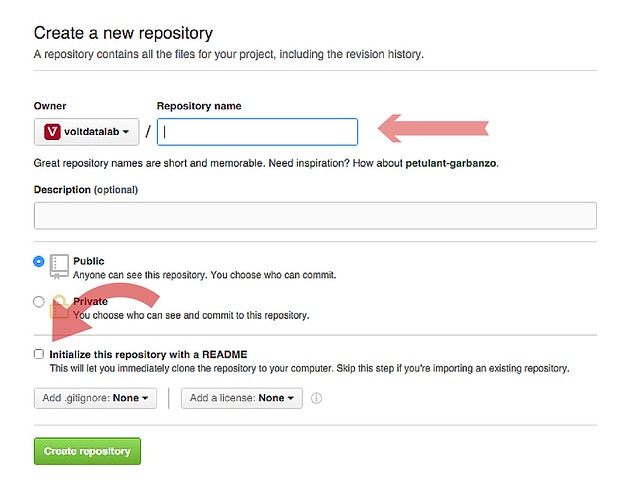
- Give a name to your repository. Inicially, right now it can be just /
test- Give it a brief description to your project. Something like:
this is a test, please don't mind this trial!. - A description is optional but it is useful and adds a good practice touch even to a test
- Give it a brief description to your project. Something like:
- Make sure to select the field
Initialize this repository with a README.- This is particularly important, because if you don’t, GitHub will assume you are initializing and organizing your repo through a different process, and you will not be able to populate your project just yet. It is easier to just check it.
- The repo page must appear exactly as shown in the image below
- Of course, note for any difference in title, content etc, but otherwhise should be the same
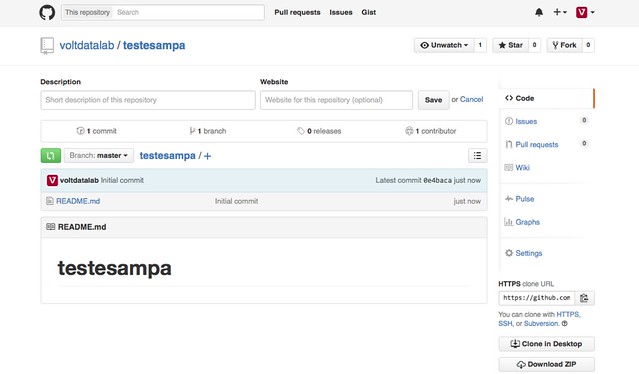
- Now that you are in the repo page, this is where you will add your codes.
- If you have HTML and CSS ready, great!. If not, feel free to use this one as an example
- What you will do next is upload the codes, using either
CTRL+C + CTRL+Vor theupload filesbutton - Add a description to your project if you haven’t done so, but ignore - for the time being - the field website.

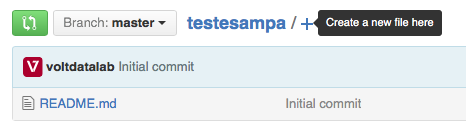
- If you want to copy and paste your code, click in
create a new filebutton - If you want to upload files, like
.htmland.css, clickupload files
- In this example, I will proceed with the more arcaic approach: copying and pasting
- Keep in mind that this is just a very simple, easy to implement approach, and its worth doing it to see how GitHub works
- We will talk about the desktop client later
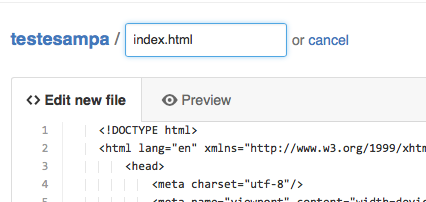
- If you copy and paste, add a name to your initial HMTL file. In this case, as this will be your initial page
(the only one for the time being in the repo), the name must be
index.html - Paste the HTML in the field below
Edit New File
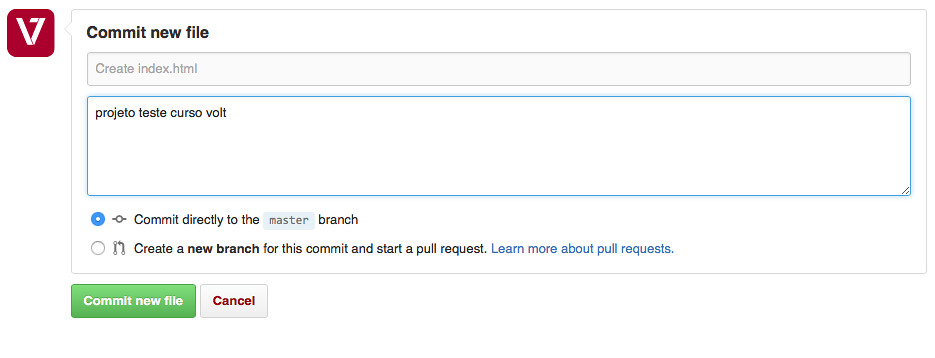
- Scroll down and give a description to your additions/changes if you want, and click the
Commitbutton. - In this case,
Commitwould work like, roughly speaking, thePublishingbutton in a CMS - Don’t worry just yet with the option
Create a new branch, it is used when you are making a separate branch in your repo, which its not our case right now
- Now we have a published file in our repo. Note that no webpage is yet live - what we just did was uploading a file that will be published
- We put our HTML out there, the basic structure. Now, we need to add the styles, the CSS
- Do the same process you did before, if you haven’t uploaded both at the same time
- IMPORTANT NOTE: remember to add, in the
<head>tags of your HTML file, the link for the CSS, like this generic example:<link rel="stylesheet" href="home.css" type="text/css" charset="utf-8">- If you don’t remember how to do it, use the code above and just change the
href=“#"value to link to your CSS. - If you CSS is in the same folder as the HTML, just add
NAME OF CSS.cssto thehref. If it is in a folder, addFOLDER NAME/NAME OF CSS.css
- If you don’t remember how to do it, use the code above and just change the
- If you are done with all the steps, we are almost there
- Go to the main page of your repository, where are your HTML and CSS files
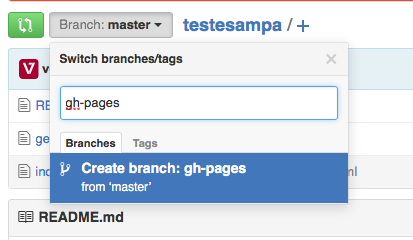
- Just above the files, on the left side, there is a small box that says
Branch: master - We will click on it and, in the text field, we will write
gh-pages - Then
Create Branch: gh-pages- This is how GitHub will understand that you will want a proper published page, not just the files in a repo
- Again, the main page will be
index.html.
- We are almost done
- You page is practically published
- In that field we ignored at first -
Edit -> Website- we will add another thing, not so obvious but pretty simple - As GitHub uses its domain github.com for repositories, it redirects all GH-Pages sites to another domain, ending in
github.io - In the field
Website, add this:http://NAME OF YOUR REPOSITORY.github.io/**NAME OF THE PROJECT - Don’t forget the
http://prefix

- Your project will be live in the URL you just added - click on it to see
- Sometimes GitHub will take up to 30 seconds to recognize changes, so be patient
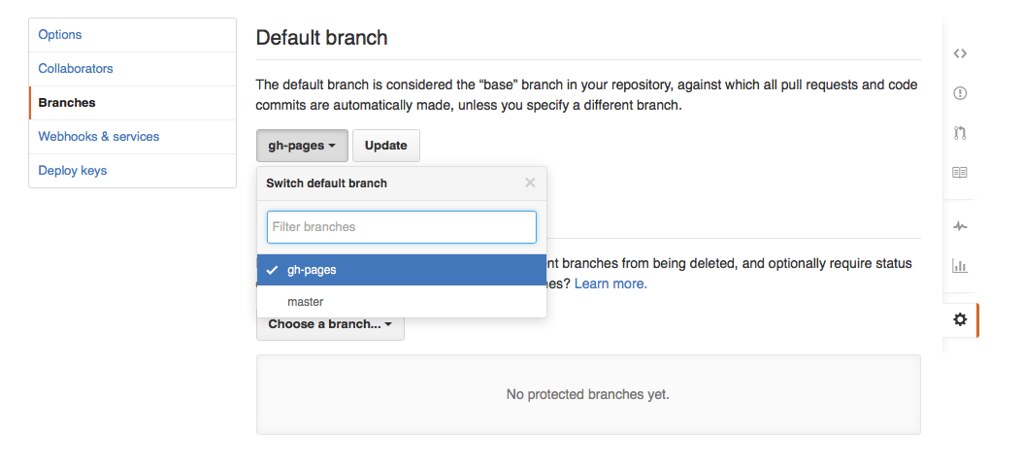
- One last thing: now that you have to branches in the same repo,
masterandgh-pages, you need to prioritizegh-pages- If you do changes in
master, you webpage won’t recognize it, because it is in a different branch
- If you do changes in
- To make
gh-pagesyou standard for this repo, go to `Settings_ > Branches > Select gh-pages in the box > Update - If you want, you can now erase the
masterbranch in thebranchestab back in your repo.- This won’t affect your page